MAGrowers 700w Samsung strip build

Magrowers

Active Member
First - If someone happens to see this while I am posting...let me finish. I am going to be posting for awhile so lay off for an hour or so. I will let you know when you are good to go.

This is based on a 5x5 tent. The actual leds are about 44” so if you shrink the frame and heat sink length you probably could squeeze it in. Alternatively you can replace each 4’ with 2 2’ strips. This is a minimalist setup, but if you do things right it will be an extremely solid setup.

Tools
-Drill
-11/64th drill bit (size for #8 bolts)
-Screwdriver
-Rubbing alcohol (to clean heat sinks before applying thermal tape)
-Adjustable wrench (to hold #8 nuts)
-Wire stripper or be very very good/careful with a razor blade, seriously get/borrow some strippers
-dremel tool to shave down 1 aluminum angle so it will fit between 2 heatsinks-not necessary if you can figure out an alternate method of mounting heat sinks
-Zip ties - a bunch for keeping wires to frame
-Fave color sharpie...get a nice thin or new one...not a old shitty used one
-if available a heat measuring gun or if you are extremely lucky a thermal camera

Parts

Digikey.com
SI-B8VZ91B20WW 4’ Samsung 3000k 561c leds (I got 6..vary for your size area)

Digikey
1 CORD 18AWG NEMA 5-15P TO CBL 15 (15’ cord, you can buy shorter or longer depending on needs)

Arrow.com
3 HLG-240H-48A drivers 1 driver powers 2 strips. You can use a bunch of different drivers. Do your research. This was the cheapest option that I found. (They sell 480-48’s which will power 4 strips)

Heatsink USA
6 pieces of 2.079" Wide Extruded Aluminum Heatsink 48” long (one for each strip)

Home Depot
3 Aluminum angle 1x 1/16 x 48 - you can go 1/8th if you want more thickness, I don’t think it’s needed. Thicker will help prevent twist.

Amazon or eBay.
Double sided thermal conductive tape 45mm width, length depends on how many strips...most rolls are 25 meters long which is plenty. Alternately you can buy thinner width and double up.

Amazon, Lowe’s, Home Depot
4 way outdoor junction box ( or any junction box) I got an all plastic one from China that took a month to get here. But it was worth it.

Amazon
25’ or so of 18 gauge wire (solid copper or tin plated copper)

Homedepot
Machine screw pack #8-32 x 3/4 in round combo w nuts (75 pack is cheap)

4 Eye bolts (go to homedepot and look at their selection...get ones that will fit your ratchet ropes and make sure you have a drill bit that will work to make the holes for it)

4 extra bolts for your eye bolts

Loctite (blue)

Amazon
About 15 Wago connectors lever nuts 4 connectors (most of the time you only use 3 spots..if you want to use reg wire nuts for power cord to 3 ballasts you can just use the 3 slot connectors. Buy the 25 pack, they are useful. In this build I use 3 slot wagos and wire nuts.

4 rope ratchets to hang in tent

Optional recommended - Self tapping screws #8x1/2 (3 or so per strip..bulk are cheap) used to attach strips to heatsinks in addition to tape

Optional recommended - rubber stoppers to cover screw ends of eye bolts/act as feet
 

Magrowers

Active Member
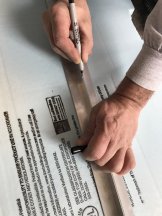
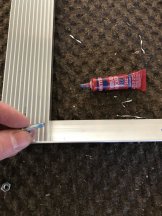
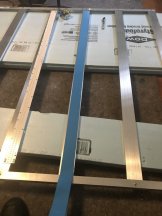
First take your aluminum angles and mark them where you want to align your heat sink with your sharpie. Make sure you mark both angles with exactly the same measurements so the heatsinks stay square. The strength of the frame is the heatsinks, the angles just hold everything together and give you something to attach the power supplies to.

5564

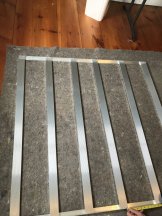
Keep in mind that this will be going in your tent so make sure you account for the side gaps. I like to place the first bar 4 inches in (center of heatsink), then place the others 8 inches away from each other so the least one ends up 4 inches from the end. This will have it so the first and last light are 10 inches away from the sides. But do whatever you like/makes sense to you.

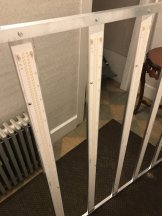
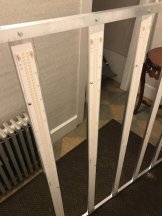
Lay out your entire frame to make sure it looks right. 5565
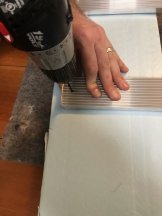
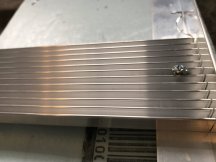
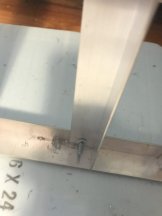
Now to start drilling. Take your drill and 11/64th drill and make your hole about in the center of the aluminum angle. Drill between the fins.Hold the heatsink & angle tight together. Drill slow and don't put too much pressure otherwise you will break the bit (i have done that a couple of times). The fins sometimes "bind" the bit. back it out and start again slow...it helps to have a little speed. There will be a ton of aluminum pieces. Don’t do on a carpet, you might want a vacuum to clean up immediately after you drill each hole.
IMG_3447.jpg
IMG_3441.jpg

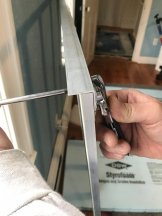
Once you have the hole put a screw and and fasten a nut to it...just finger tight for now. I would do the far right and left heatsinks first and fill in the middle...that helps keep things square.

5568
After you are all done put the frame on its end and apply locktite to the screws one by one and crank them down so they are nice and tight.
5569
5570
 

Attachments

Magrowers

Active Member
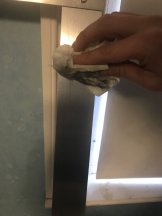
Place the frame on its “back” so the heat sink surface is facing up. Rub down the heat sink surface with alcohol to clean them up (they are dirty!)
5571
Measure out the length of your 4ft strip (really 44 inches or 1120 mm) on the heat sink. You want to figure out placement to get the strip centered and how much tape to put down.

Lay down your tape making sure you go a little bit long so you are certain the entire strip will be attached. Try and make it as smooth as possible. This is a ton easier with another person.
5572
Peel the protective top layer of the tape and place your strips down. Go back and forth pressing it down so it is firmly attached everywhere.
 

Magrowers

Active Member
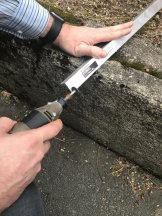
Put your frame against the wall. Take your 3rd angle and check the length as if you wanted to place it between the two center heatsinks. You will notice it’s a touch long. Make note and cut that bit off with a dremel tool. It just has to fit it’s not load bearing so it can fit loosely between the other angles. Cut this outside, aluminum dust isn’t cool.
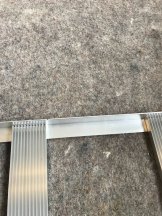
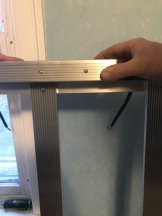
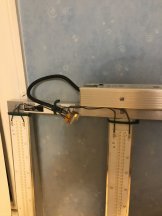
Put the angle between your middle heatsinks and drill through both pieces of aluminum (using the same drill bit as before) so you can fasten the two together using a screw and bolt. Do this to both sides. Fasten using the same bolts and nuts. Use locktite. I would suggest putting the screw head in from the strip side so that the long end of the screw is facing up (ie you won’t hit your head on it accidentally while you are under the light in your garden)
5574557555765577
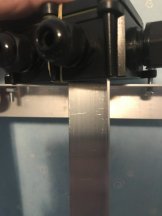
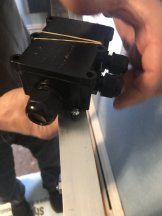
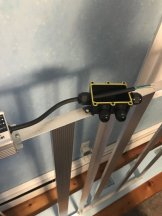
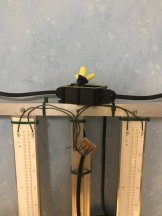
Place your junction box where you want it on the frame (I suggest center). Make sure when you go to screw it in that the piece of aluminum you just installed won’t interfere with your instillation. Mark where you want your holes and drill them. To assist I like to take a small drill bit through the junction box bolt hole and scratch the aluminum so I know where to drill the hole. Drill the holes using the same 11/16 bit and bolt it in using locktite.5578
 

Magrowers

Active Member
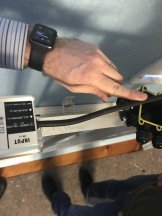
Now you need to bolt the power supplies in. One on the left of the junction one on the right, and one on the last aluminum angle you installed. Run the power supply input through the junction box to help figure out placement. Mark on the frame where the bolt holes should be and drill. Attach using bolts and locktite. Repeat on the other side and the center.5583
557955805582
Run your power cord through the last hole in the junction box.

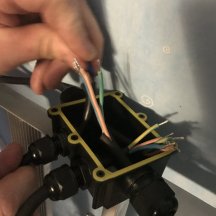
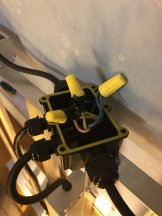
Now is probably the most critical/difficult/dangerous parts. If you are unfamiliar or uncomfortable with working with electricity get someone who is. You need to connect all the blue wires together using a wire nut or wago. All the Browns together. All the yellow/blue stripped together. Make GOOD connections, bad connections will arc or heat up. You are asking for a fire with bad connections. Couple of hints. Strip off some the black outer insulator to give you more wire length to move around in the junction box. Strip off a little more insulator on the individual wires coming off the power supplies, they are a little short (for wire nuts). You will put the junction box cover on after you test fire the strips. FYI you can see the 3rd ballast attached to the crossmember. I didnt get any great photos of it.

5584
 

Magrowers

Active Member
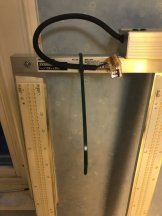
Now to wire up the strips. I first like to zip tie the black output wire to the frame somewhere in the middle of the strips I am powering ( left to the 2 left most strips, right to the last two on the right, center to the center 2). Attach a wago to the positive positive wire. Strip a little less than a quarter of an inch off your spool of solid cord 18 gauge wire. Insert that end into the positive wire connector on the strip. You shouldn’t see bare wire when you push it in and your shouldnt be able to pull it out with light pressure. If you need to remove the wire there is a little flap to push on the strip connector to release the wire. Carefully unspool the wire the proper length to get to the wago and cut the wire. Strip the end. Attach to the wago. Keep in mind you are going to want to run the wire along the frame because you are going to want to zip tie it to keep it secure. Avoid any sharp bends in the wire. Repeat for the positive on the 2nd strip. Do the same thing for the negative. Now repeat on the other power supplies and strips. Zip tie everything at regular intervals to keep stuff tight and prevent stuff from snagging it. 5587
55865588
 

Magrowers

Active Member
Now that you are all attached look at your power supplies. There should be two small rubber plugs on the body of the power supply. Pull off the one that says io and turn the small dial in there down (all the way to the left) this is lowering the amps to 50%. Do this for all your supplies. This is a safety thing. If one of your strips doesn’t light you should have time to pull the plug before it starts to overheat.

Put your lights angled against the wall pointing out. Plug in your lights and be prepared to be blind. Don't touch any wires while it’s plugged into the wall. If all is well turn your power supplies back up. Let it sit for like 30 min and let everything heat up and the tape settle in. If you have a thermal camera or a heat measuring gun take some measurements. My strips ran about 100F with no airflow. Check wire junction box if you can. Pull the power plug. Put the junction box cover on. Put your rubber power supply plugs back in.

After everything cools a bit you can put the unit on the ground with the strips facing up.
 

Magrowers

Active Member
Optional but super recommended drill pilot holes in the strip pre made top hole, bottom hole, and a hole in the middle in each of the strips. Screw in self tapping screws to help securely keep the strips tight against the heat sinks. Don’t crank it down just have it push the strip firmly against the heatsink. If the screw isn’t square don’t stress..just get an edge to push on the strip.
5591
This pic has the screws in it....if you look carefully.


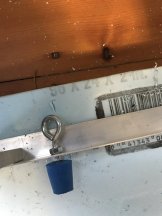
Drill holes in the corners of the frame to attach your eye bolts using whatever drill bit you need to make a hole that will fit. Thread a bolt on each of the eyebolts all the way on. Insert the eyebolt into the hole and thread the other bolt on. Use locktite.

Optional get rubber stoppers and drill a hole into one side of the stopper using a slightly smaller drill than the one for the eye bolts. Push the stoppers onto the end of the eye bolt thread that is remaining to make little feet and protect your head if you happen hit it on them.
5589

eye hook with optional stopper!


Hang your light. I recommend standing it up in just on the inside of the tent. Connect the ratchets to the top two eyelets and crank them up. Slide it back into the tent. Lift up the other side and attach to the remaining ratchets. Try to raise each side evenly to minimize twist.

Super optional. Get a couple of line levels and attach to 2 sides of the frame to help you level your light out as you raise and lower throughout the grow.
 

Magrowers

Active Member
OK i am all set post away.....

I would rather see "Hey i would have done this" or "Hey a way smarter way of doing it would be" or "This is shit because..."

The above comments are way more useful to people than "WOW awesome" or "great job"

So post if you have something meaningful to say...if not just hit the like button. That way we can have a solid resource for people to read.

Thanks!
 

Magrowers

Active Member
Ohh and let me know if there is a picture of something that isn't either above or is confusing.

Couple of notes that i forgot:

The screws should be zinc plated (lower reactivity with the aluminum, zinc should be standard, just dont get steel)

Make sure your power cord is very secure in the junction box or you get something to secure it to the frame...so nothing can pull on those wires and loosen things up. I forgot because the junction box i got was a waterproof one and it holds things incredible tight when you crank it down.
 
Last edited:

Magrowers

Active Member
heatsink USA is running a rare sale so now is a good time to grab those. I am thinking of grabbing some more for another smaller build.

Be patient and you can save some $$. It also helps if you can buy bulk for a couple of builds at the same time. (Best way to get a decent discount) Grab a grow mate. Saves on shipping too. It took me a long time to get everything together.

If I remember correctly the strips and heatsinks ran me about 400 give or take 10$ The power supplies $150 and the rest of the stuff I had mostly. So maybe 575 all in.
 

TerpyTyrone

LED Recruiter
heatsink USA is running a rare sale so now is a good time to grab those. I am thinking of grabbing some more for another smaller build.

Be patient and you can save some $$. It also helps if you can buy bulk for a couple of builds at the same time. (Best way to get a decent discount) Grab a grow mate. Saves on shipping too. It took me a long time to get everything together.

If I remember correctly the strips and heatsinks ran me about 400 give or take 10$ The power supplies $150 and the rest of the stuff I had mostly. So maybe 575 all in.
I was damn close! I've been researching. My budget was 400$ for 480w. I went with Qb132's
I will build one of these when I have the time and money.
I could do this build in a couple hours. Very well documented
 

Bruno8437

Super Active Member
Great write-up and excellent photos to go with it. Lots of details, it really helps. I'll refer back to this when I'm ready for a strip build. Thanks Magrowers!
 
Top